DIY ADS-B Flight Tracker Enclosure
Track aircraft in real time with a simple DIY ADS-B setup. Whether you’re curious about planes overhead or want to contribute data to global flight tracking networks, this project lets you do both. Built and tested in Costa Mesa, where we track everything from small planes around John Wayne Airport to commercial traffic heading to LAX.
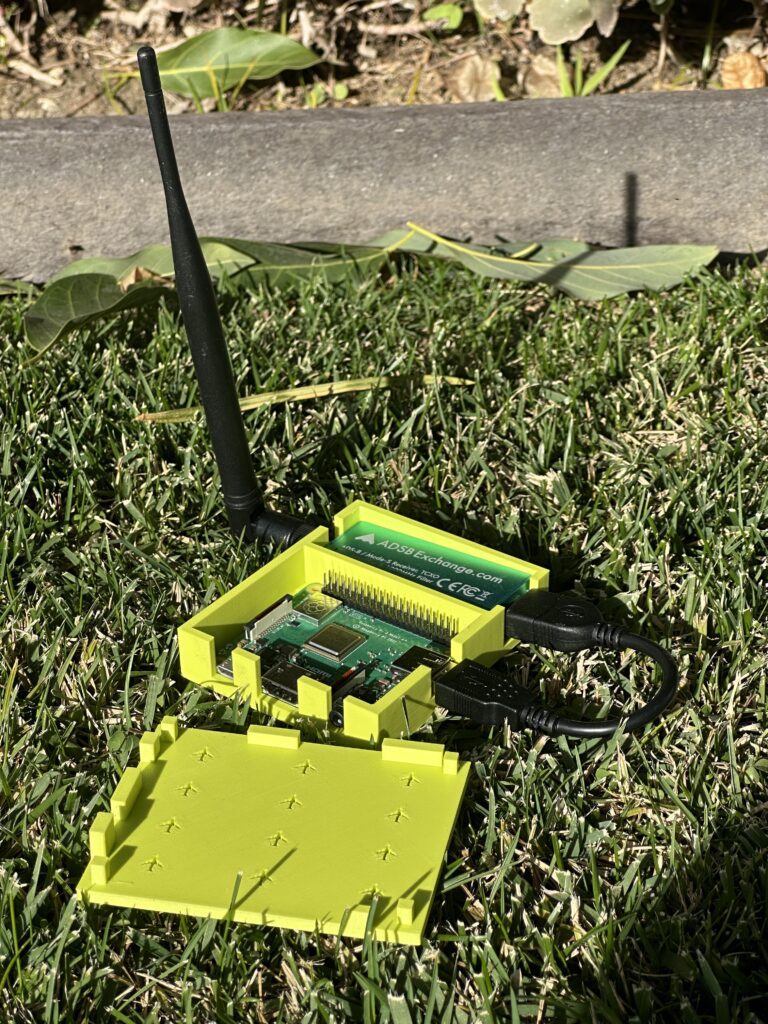
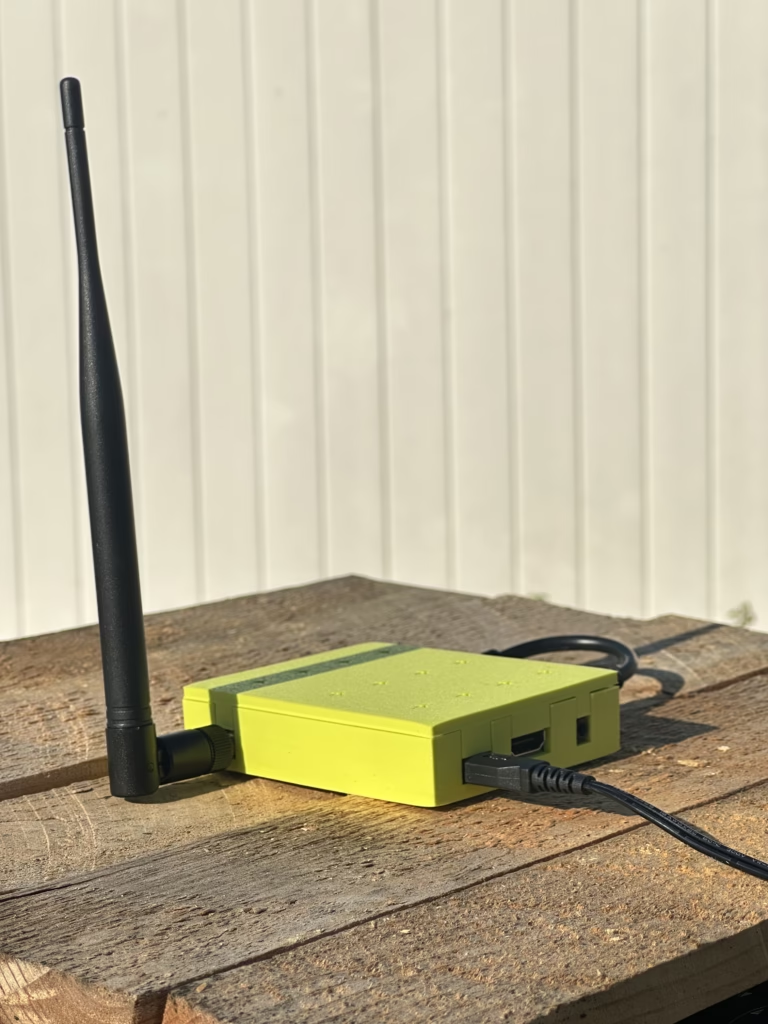
If you want a clean, compact build, this custom 3D-printed enclosure keeps the Raspberry Pi and SDR neatly mounted side by side.
What This Is
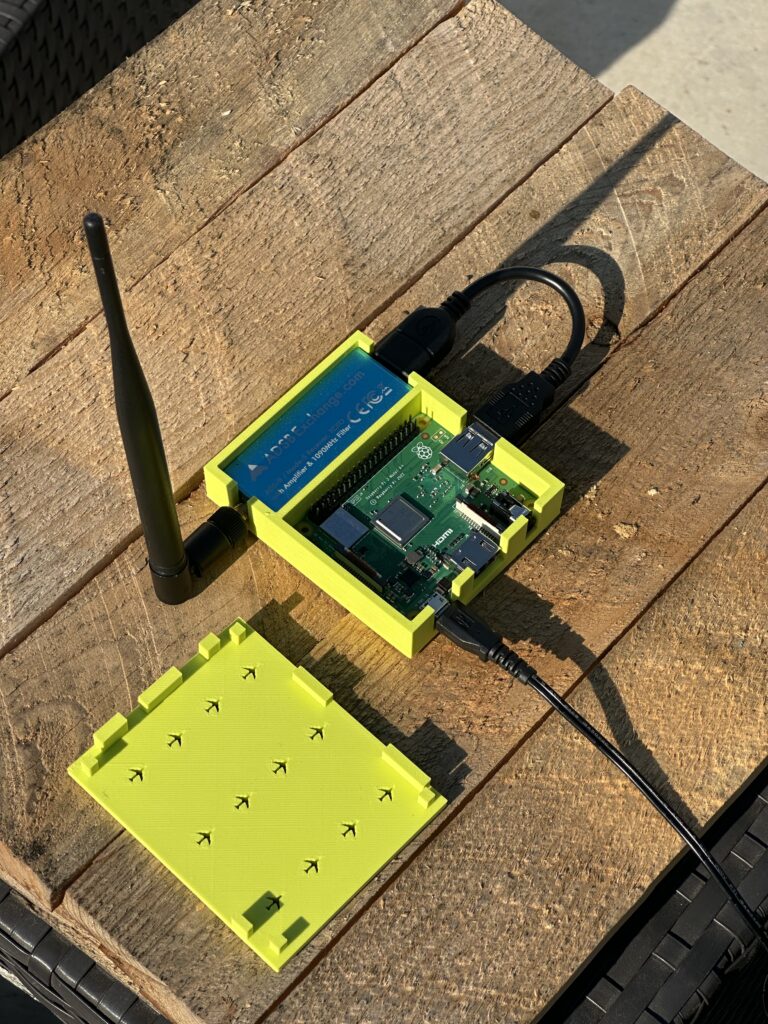
This project uses a Raspberry Pi and a USB SDR receiver to track aircraft in real time. With a custom 3D-printed case, you can build a compact, portable ADS-B receiver that looks much cleaner than a loose cable setup. It’s a fun project for aviation enthusiasts, hobbyists, and anyone curious about what’s flying overhead.
This enclosure is designed specifically for the Raspberry Pi 3 Model A+. Other Raspberry Pi models have different dimensions and port layouts, so they will not fit this case correctly.
What You’ll Need
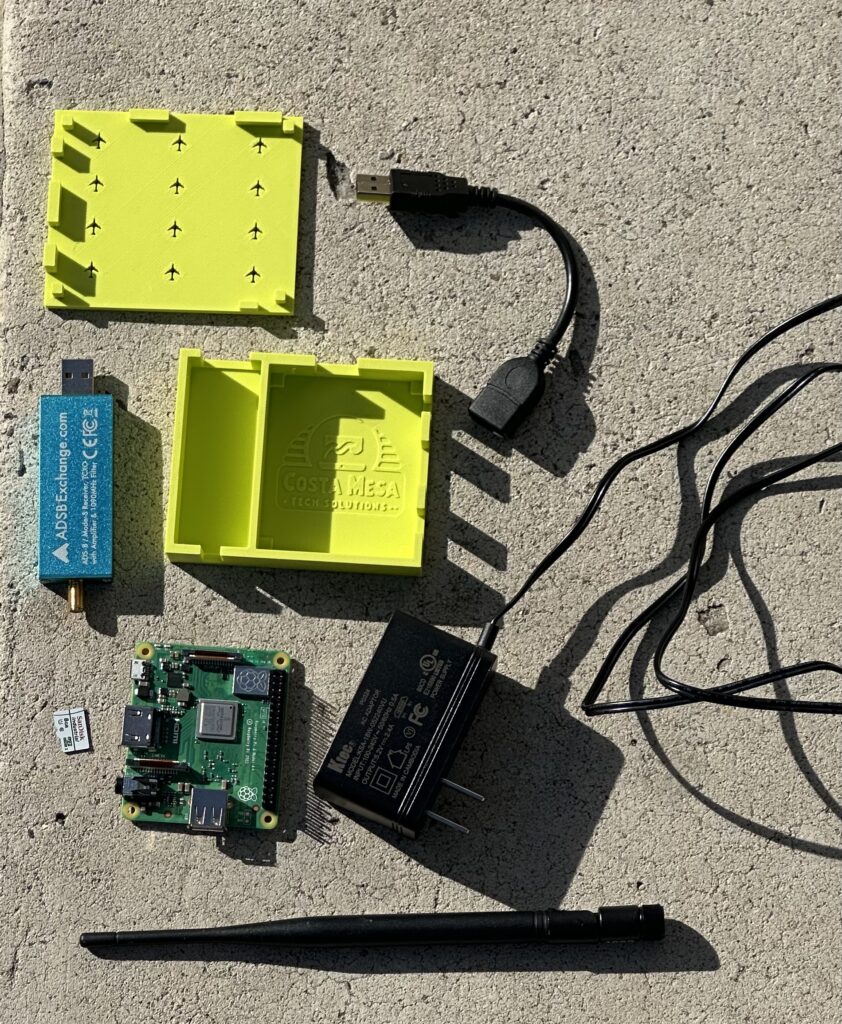
- Raspberry Pi 3 Model A+
- Required for this enclosure design
- Compact size with built-in Wi-Fi
- RTL-SDR Blog ADS-B Receiver or similar R820T2 RTL2832U SDR
- 1090 MHz ADS-B compatible
- Often sold with an antenna
- microSD card
- For Raspberry Pi OS and PiAware
- 5V 3A power supply
- A reliable supply helps avoid Pi instability
- 6-inch USB extension cable
- Connects the Pi to the SDR and helps fit the enclosure cleanly
Complete Setup Guide
1. Flash the microSD Card
- Download Raspberry Pi Imager from raspberrypi.com/software.
- Insert the microSD card into your computer.
- Open Raspberry Pi Imager.
- Choose Raspberry Pi OS (32-bit).
- Select your microSD card as the storage device.
- Open the customization settings and configure:
- Your hostname, if you want to use one
- SSH access
- Your Wi-Fi network name and password
- A custom username and password
- Click Write and wait for the process to finish.
2. Assemble the Hardware
- Insert the flashed microSD card into the Raspberry Pi.
- Connect the SDR to the Raspberry Pi using the 6-inch USB cable.
- Attach the antenna to the SDR.
- Connect the power supply to the Raspberry Pi.
- Optional: Install everything into the 3D-printed case for a cleaner finished build.
3. Connect to Your Raspberry Pi with SSH
You’ll need another computer to finish setup. Once the Pi boots and joins your Wi-Fi network, connect to it with SSH.
- Open Terminal on macOS or Linux, or use an SSH client such as PuTTY on Windows.
- If you set a hostname in Raspberry Pi Imager, connect with:
ssh [username]@[hostname].local - If that doesn’t work, find your Raspberry Pi’s IP address in your router’s connected devices list.
- Connect with:
ssh [username]@[your-pi-ip-address] - When prompted, enter the password you created in Raspberry Pi Imager.
4. Update Raspberry Pi OS
Before installing PiAware, update your Raspberry Pi so you start with the latest packages:
sudo apt update
sudo apt full-upgrade
sudo reboot
After the Pi reboots, reconnect with SSH before continuing.
5. Install PiAware
PiAware is not included in the default Raspberry Pi software repositories, so you’ll first add FlightAware’s repository, then install PiAware:
wget https://www.flightaware.com/adsb/piaware/files/packages/pool/piaware/f/flightaware-apt-repository/flightaware-apt-repository_1.2_all.deb
sudo dpkg -i flightaware-apt-repository_1.2_all.deb
sudo apt update
sudo apt install piaware
6. Install the ADS-B Decoder
Install dump1090-fa, which receives and decodes aircraft ADS-B messages:
sudo apt install dump1090-faIf you’re in the United States and also want to receive 978 MHz UAT traffic, you can optionally install:
sudo apt install dump978-faOnce installation is complete, reboot your Pi:
sudo reboot7. Claim Your Receiver on FlightAware
- Wait about 5 minutes after reboot so PiAware can start sending data.
- Go to FlightAware’s claim page.
- Sign in or create a FlightAware account.
- Follow the on-screen instructions to claim your receiver.
- FlightAware usually begins showing statistics within about 30 minutes.
8. Start Tracking
Once your receiver is running, you can:
- View local real-time aircraft data in SkyAware by opening
http://[your-pi-ip-address]:8080in a web browser on your local network. - View your FlightAware stats page and qualify for free premium FlightAware benefits by sharing data.
- Optionally feed other networks such as ADSBexchange or Flightradar24.
Antenna Placement Tips
- Place the antenna as high as practical for better line-of-sight reception.
- A window-facing location usually works much better than placing it deep inside a room.
- Keep the antenna away from large metal objects, TVs, routers, and other electronics when possible.
- Small changes in antenna placement can make a surprisingly big difference in range.
Get the 3D-Printed Case
Price: $3 – $10 (name your price)
This enclosure is designed specifically for the Raspberry Pi 3 Model A+ used in this guide.
Don’t have a 3D printer? Contact us and we may be able to help.